

It’s definitely beginning to feel like Christmas in the I.E. household even though we’re up to our eyes trying to get our bedroom finished before Christmas! Like many, it’s my favourite time of year. The fireplace is the heart of many a family gathering for cosy winter evenings. It’s no surprise then that our mantlepiece has to be my absolute favoured part of the home to decorate. I get excited just thinking about it so I can unleash some creativity. Anything goes in my books and the larger the better!
Last Years Christmas Fireplace
Last years mantlepiece went down a real treat so I thought I’d make a similar one this year for those of you that said you’d like to know how I created my mantlepiece design. It may look complicated but it really is quite straightforward. I’ve even made a video of me in action at the end of this post putting together my mantelpiece.
How To Create A Magical Woodland Christmas Mantelpiece

This year, I thought I’d go with a Magical Woodland theme after spotting these stags (below) from Wilkinsons for a bargain £2 each (and they have a buy 3 get one free offer on all their Christmas decs!)

Add Longevity By Mixing It Up!

I like to mix up real with faux to add longevity as well as being able to reuse pieces again the following year. Like these twigs from Waitrose which I spotted again this year in store.
Tip: If you’ve time and are on a tight budget you could always use twigs/small branches from the garden. Either spray them gold or leave them natural.
The Real

There’s nothing like fresh greenery to add that natural touch that artificial cannot touch when it comes to decorating your fireplace mantles.
I like to use some traditional conifer and blue pine to add to the look and feel of Christmas. And they smell amazing too! You could add other foliage such as eucalyptus and holly.

I bought one piece of blue pine from our local florist. Expect to pay around £2.50-£5 a branch. Just make sure you choose one that’s got lots of stems on it!
If you like blue pine but don’t have the funds, some local garden centres have offcuts from the sales of Christmas trees and they’ll often let you have some for free or for a small price.

Again if you’re wanting to keep costs down, (who doesn’t at this time of year!) then it’s a great idea to look at your garden and see what types of evergreen foliage you might have that you could use. We’re fortunate to have conifer trees in our garden which is what I’ve used for our mantlepiece. If you don’t, turn to family and friends or even neighbours to see if they’ll let you have some.

I also love Ivy as it trails beautifully and again another classic Christmas foliage. I actually got mine from my mums garden.
Plants!!

Miniature Christmas trees are just the cutest and so I try and incorporate them into my decor whenever I can.
As many will know from my Kitchen Makeover I’m a huge plant lover so my mantle always has to include plants. For one they add to the longevity of your fireplace mantle just keep them watered and two you get to use them around your home afterwards.
As with last year’s mantlepiece, I’ve used two of my favourites orchids (from Marks and Spencers) and mini Christmas trees from Waitrose.
The Essentials
Because you’ll be using real foliage and will want it to last, florist foam is essential. I required four blocks for our mantle but you may need less depending upon how large/small your fireplace is. You can buy them at your local florist for about £1.50-£2 a block or Wilkinsons have them too. If you’re pressed for time you can always buy them from Amazon here.

You’ll also need florist brick trays to put the florist foam in as well as florist pot tape. Again, see buying these as a little investment for future Christmas’s as you’ll be able to discard the used florist foam at the end of this Christmas and use the trays again next year! Again, if you’re lacking time to get to your florist then Amazon have them here and here.
A sharp pair of scissors that will be able to cut through the foliage stems. Secateurs are a great alternative if you prefer/have those.
Extras

Fresh flowers only last up to around 5 days so I prefer to use faux flowers when it comes to my fireplace mantle as I like to create mine usually around two weeks before Christmas and want it to last. Again, you can reuse them again for like I have mine this year.
The How-To!
If you’d like to create something similar, I’ve put together the different steps involved in creating your own mantle masterpiece for Christmas. If you want to skip the how to you can always watch me in action by scrolling down to my video at the end of this post.
1. Soak That Foam

Soak your floral foam in cold water until they feel really heavy. This usually takes about 5-10 minutes. I’m the impatient sort and so I tend to stick a florist wire several times in the foam to help draw the water up quicker. You can also speed up soaking time by turning the bricks over in between.
Whilst the foam is soaking you might want to gather all your decorative pieces, plants (if using) and foliage so you’ve everything to hand for when you start.
You’ll also want to put down some form of protection around the fireplace. I just use bin bags so I can gather up all the debris easily after I’ve finished.
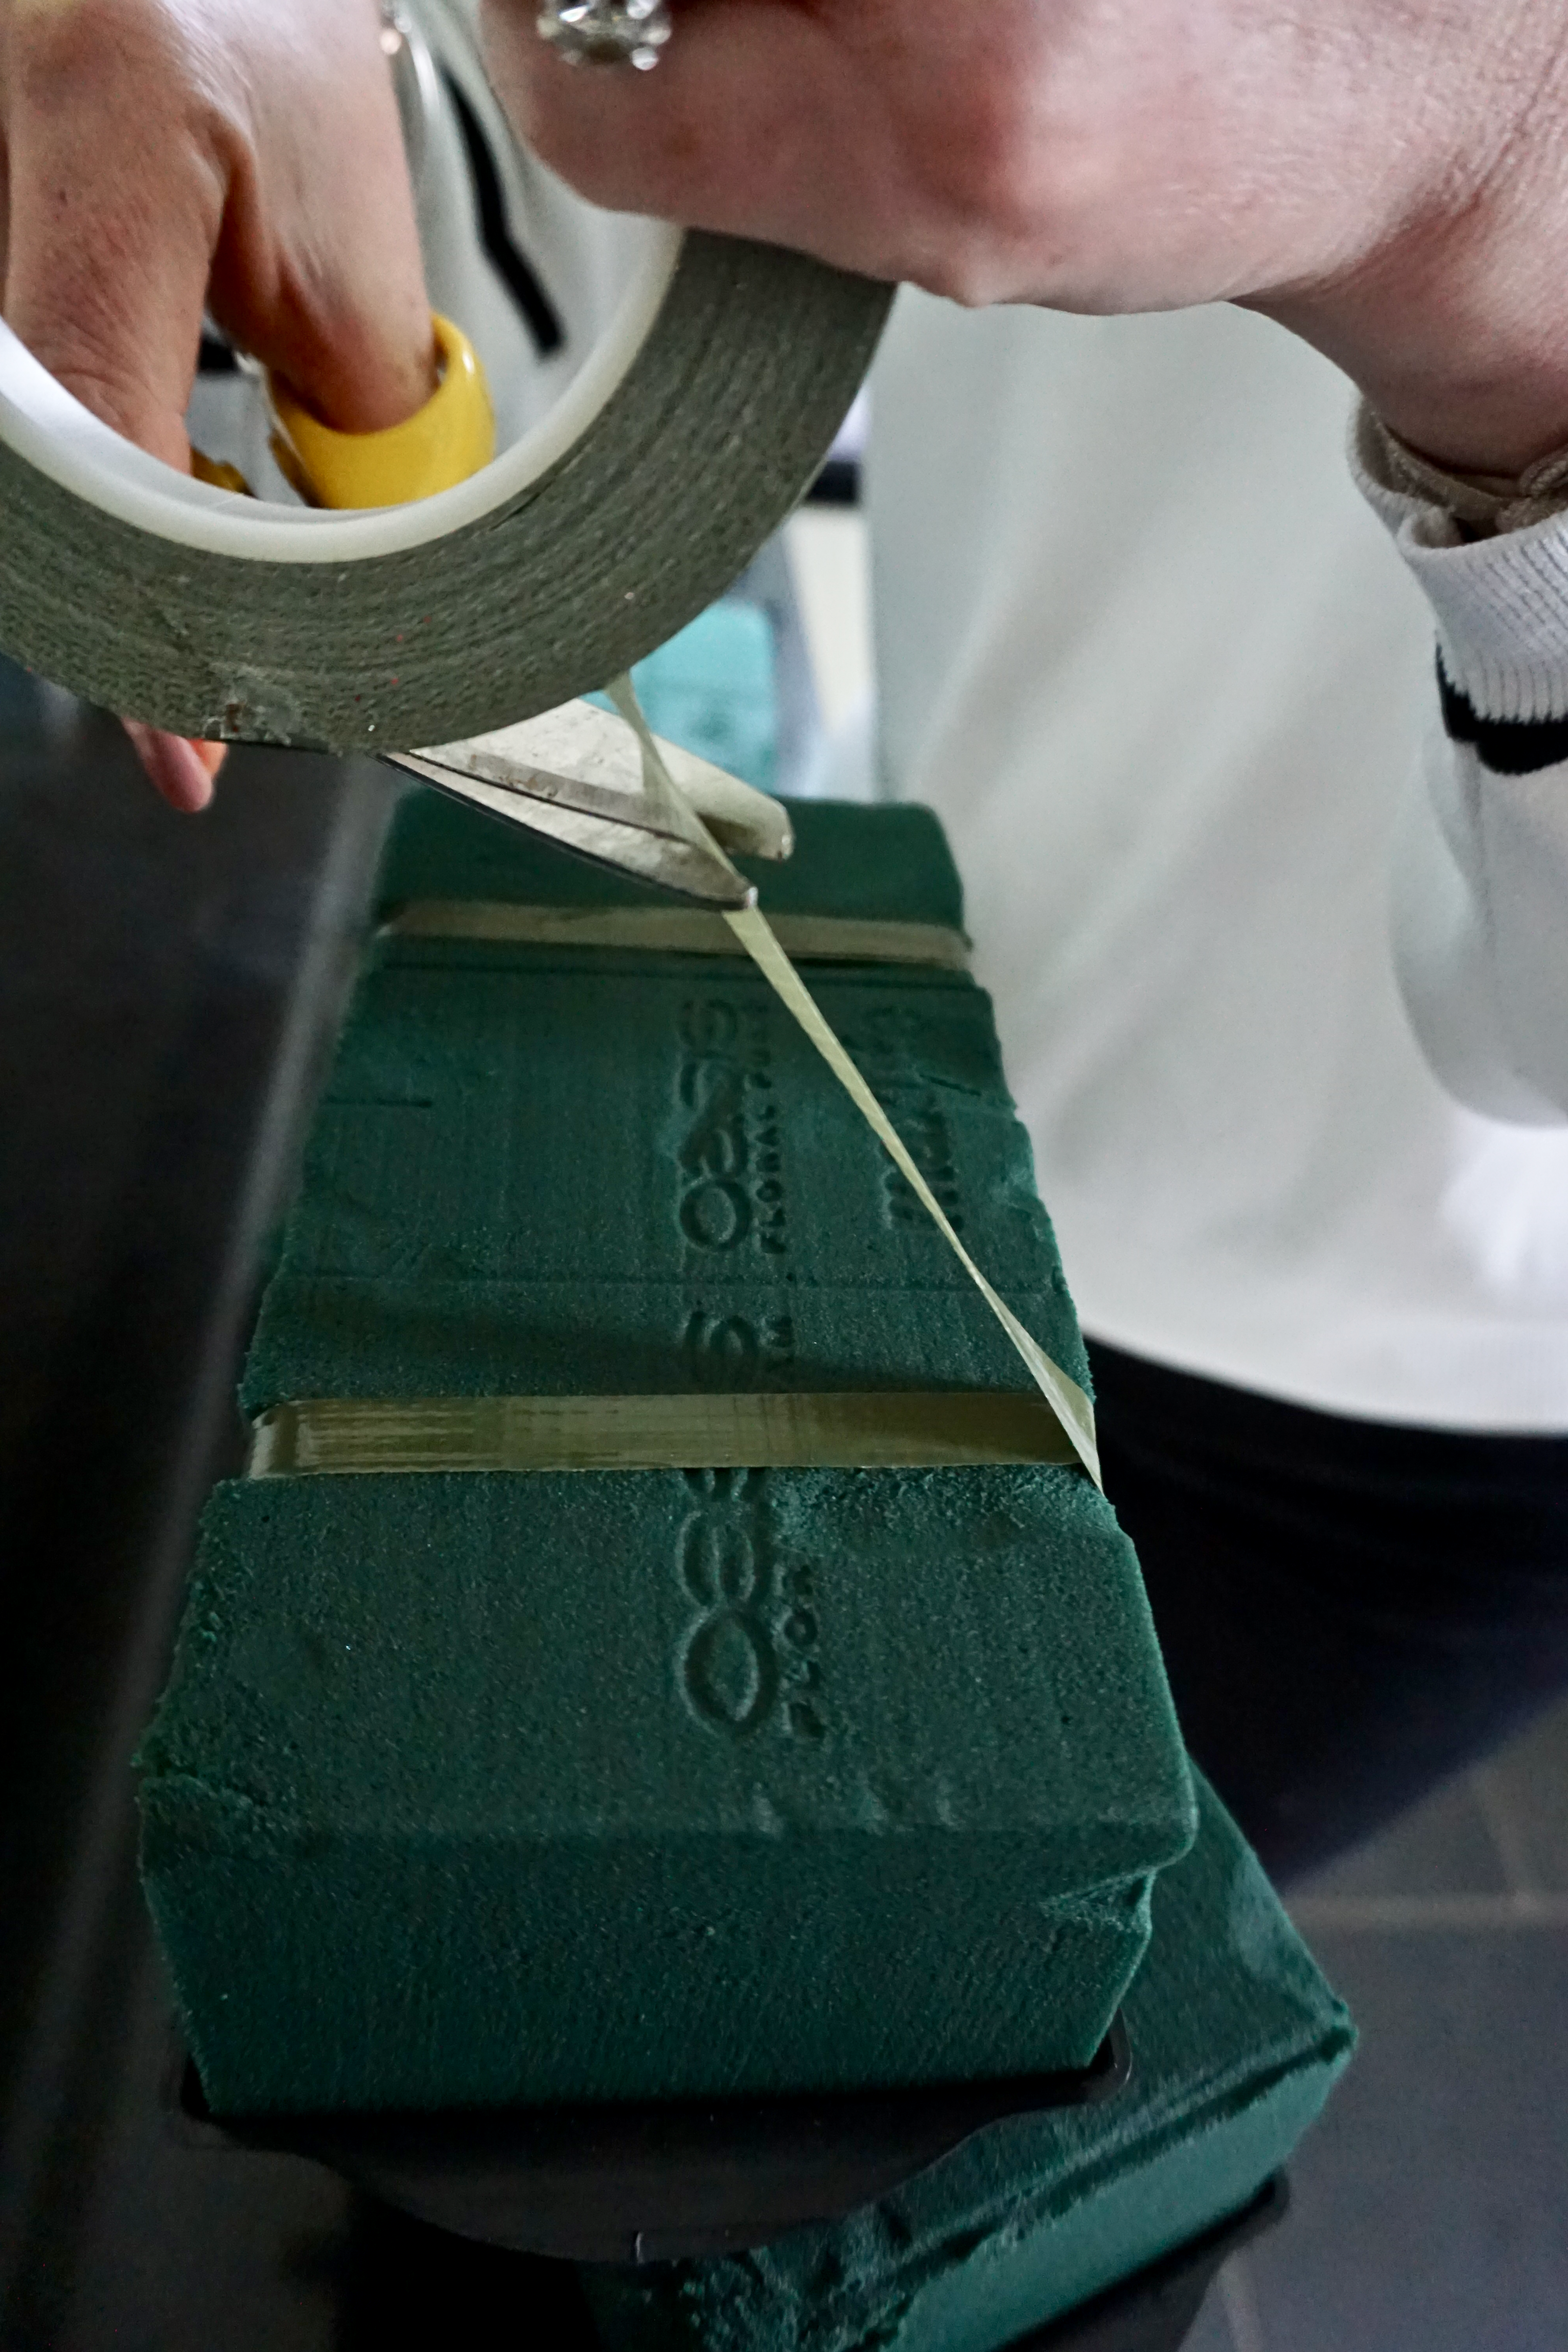
2. Secure

Next you’ll need to secure the florist foam into the brick trays with the florist tape. Make sure you wind the tape the whole way around the block and tray for extra security.
3. Placement

I placed my orchids and florist foam (in trays) so they were uniform. I then placed my mini trees and stags on top of the foam.
I prefer a symmetrical look to my mantelpiece as it’s easier on the eye but it’s entirely up to you how you place yours. Once I positioned my orchids and florist foam in their trays, I simply placed the mini trees and stags on top.
Tip: If you’re placing pieces on top of your florist foam you’ll need to check their waterproof as the bottoms will get wet from the foam. You can always place a piece of plastic to the bottom of a pot if they’re not.
4. Add Your Foliage

The next step is to start cutting your foliage to push into the florist foam. Angle the stems downwards as you don’t want the foliage sticking out/or upwards. You’re looking for a soft natural fall.
Tip: Ensure the end of your stems are free from needles/leaves before pushing it into the florist foam. This will allow the stem to take up water from the foam and ensure your display will last longer. Cleaner stems are easier to push into the foam too.

It’s a good plan to start one end of your mantle and work your way along. I like my foliage to hang down slightly but not too low as we use the fire in the evenings.
TIP: Cut longer stems to frame the mantelpiece when you start. Smaller stems can be added once you’ve got the shape that you want to achieve.

Using longer stems and angling them ensures the gaps where the orchid pots are are hidden.

Once you’ve formed the outline to your mantle design, you can then start adding smaller stems of foliage to cover the florist foam. Make sure all stems are firmly pushed into the foam to ensure they receive water to keep them alive.
Oops.. The Branches!

I got so carried away, that I actually forgot to add the branches! What can I say, I get incredibly excited about creating our mantel. And to be fair, I was a little self-conscious as my daughter was filming/photographing the whole process. I might have been a teensy bit overwhelmed lol.
Anyway, I should have added these at the beginning to add some visual height and interest.
Starting To Take Shape


Start adding smaller stems of foliage to cover the florist foam and hide the pots.


Once you’ve added all your foliage, it’s just a case of then adding any additional pieces you want to adorn your mantelpiece.

I added pine cones to add some warmth and woodland charm.

Next up faux roses…


I used touches of ivy and threaded them through the branches as well as some fairy lights in between the foliage and plants.

I then added some cute clip-on birds to the branches and ivy.

And as a final touch, some gold leaf garland from Wilkinsons because a girl can never have too much gold and glitter in her life.

The Finished Magical Woodland Christmas Mantlepiece


And there you have my Winter Wonderland Christmas Mantlepiece. Now all I have to do is keep the plants watered as well as the florist foam by carefully using a small watering can to keep it moist. You can also mist spray the foliage to help keep it looking as fresh as possible too.
You can watch the whole process of how I put it together below…

Pin to Pinterest
Do you love decorating your fireplace too? It’d be great to hear from you especially if I’ve helped you create your own Winter Wonderland inspired mantlepiece design.
Have a great week and as always thanks for stopping by!
Maria xx


6 Comments
Wow that looks stunning Maria! I’m really inspired and will be off to do a bit of foraging shortly to see what I can find for my Christmas Mantelpiece.
Thanks Fiona!! I’m thrilled that you’ve been inspired to go create your own woodland mantelpiece ☺️🎄
Wow Maria, that looks so beautiful… absolutely stunning! Lovely to see your step by step too, thank you for that!
Wow! This is absolutely stunning Maria. What a good idea and such a helpful guide. x #HomeEtc
This is so gorgeous Maria! I felt very in limbo with the house this year so we didn’t do any Christmas decorating really, but I’ll be READY come December and will be revisiting this post for tips X #HomeEtc
Oh this is gorgeous and makes me want a mantlepiece just so I can have one! #HomeEtc